TABLE OF CONTENTS
11. Delete or Duplicate Dropdown Menu
 Navigating to the Visual Editor (Build)
To navigate to the Visual Editor from the main login page, you will first need to go into Studio - whether accessing an existing study or creating a study from scratch.
- Access a study by clicking on ‘Create a new survey’ from the main page or the Studio page from the main menu. Alternatively, you may also click on an existing study to access its Studio page.
- Once inside the Studio (main study), click on the Build button to access the Visual Editor view.
(*Note: By default, the Visual Editor is the first page you see when creating a new study.)
Features in the Visual Editor
1. The Layout
The Visual Editor (Build) view covers a few basic features to familiarize yourself with:
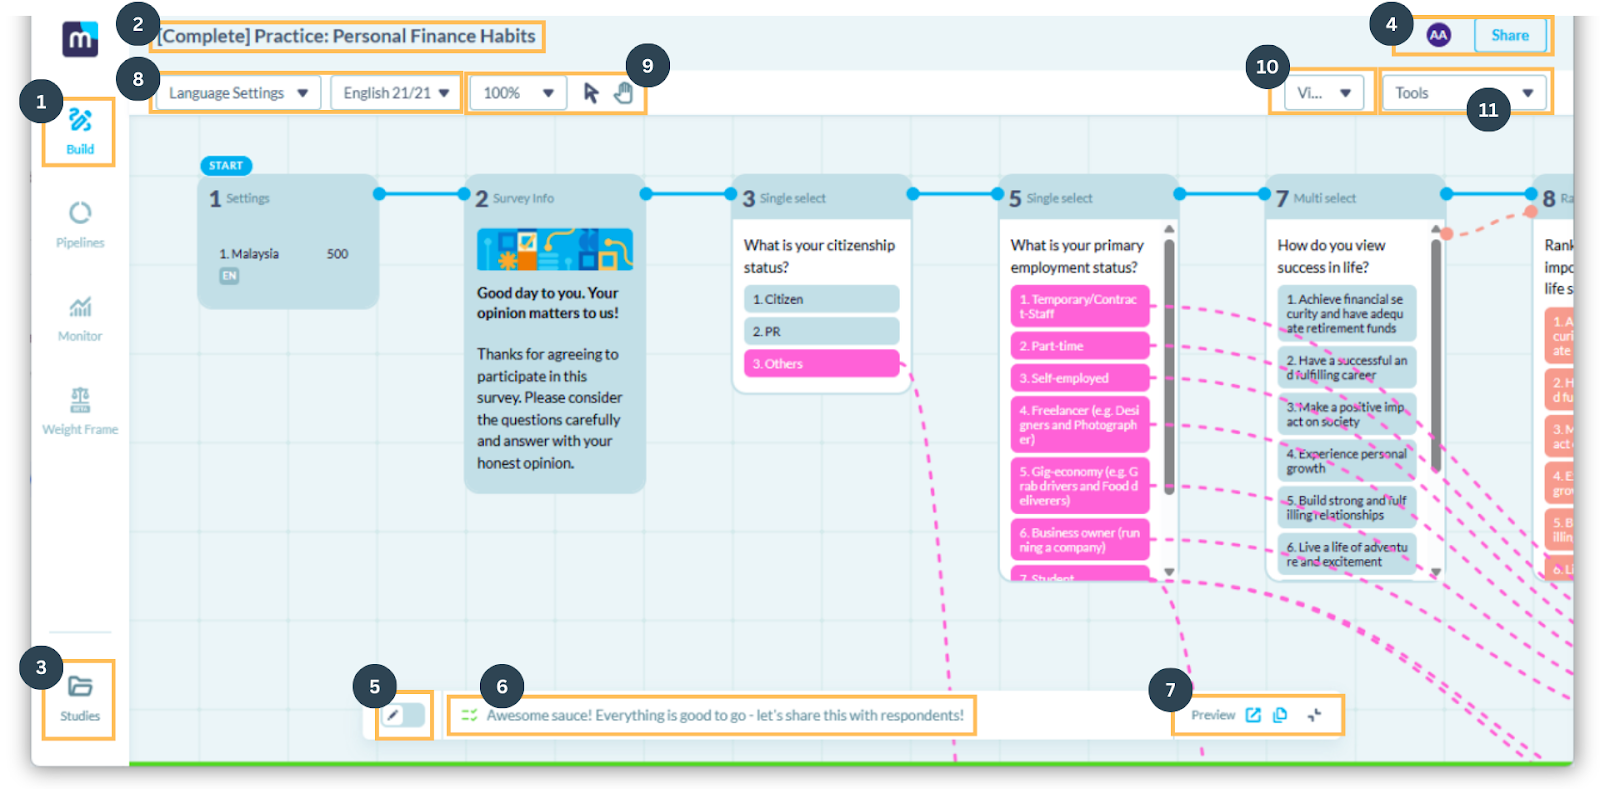
2. Naming the Survey
Update the name of your study through the pencil icon next to the name of the survey.
(*Note: The pencil icon will only appear when you hover over the survey name.)
3. Quick Access
Quick access to other studies from the Visual Editor without having to exit the Visual Editor or Studio study view.
4. Share Function
You may share the study with other users in the same organisation for a collaborative experience.
- To share access with other users, select the Share button and search for the user by their name, email address, or teams.
- Select the access level you would like to assign to the user: Editor or Viewer.
(*Note: By default, a created study can only be viewed by the owner of the created study so be sure to share the study with other users if you would like them to have access to it too.)
5. Edit Mode Toggle

When the toggle is off (pencil on the left), the study is in preview mode. When the pencil is toggled on (on the right), the study is in editing mode.
(*Note: When study is in Edit mode, most functions will be unavailable to be accessed until the study is saved and back in Preview mode)
6. Dynamic Info Text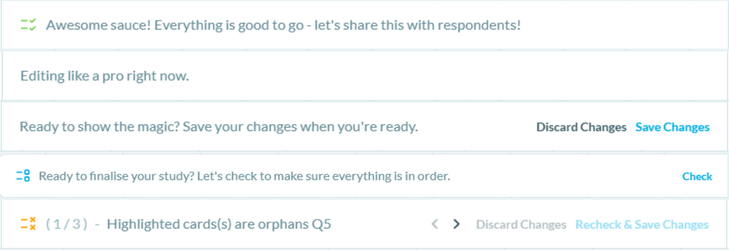
Find out more information about checks for errors/ actions when designing/ editing your survey. You can also save the study via the Save button before the study is ready for preview or publish.
(*Note: It sometimes requires clicking preview first in order to trigger the Save button.)
7. Study Preview
Use the Study Preview (i.e. the pop-up and copy icons) to test out the survey through a web browser.

- The first icon will pop-up the survey preview on a new tab or window
- The second icon copies the survey preview link.
- This is specifically useful for sharing the preview link with another person in order to test the survey before deciding to distribute them.
8. Language Setting
Manage language settings AFTER editing it in the Setting Card (First card in the Visual Editor). You can configure the languages for the survey to be available in and have an overview of the cards for translations.
9. Zoom & Scroll Mode
(L-R) Zoom in and/ or out the zoom tool, click around with the mouse mode, move around the Visual Editor with the hand mode.
10. Routing Visuals
Visual Editor Connection view dropdown. Here, you can choose to hide some views such as routing connections (lines), piping connections or even question cards and/or logic cards. The default view is to show all.

All connection options are visible
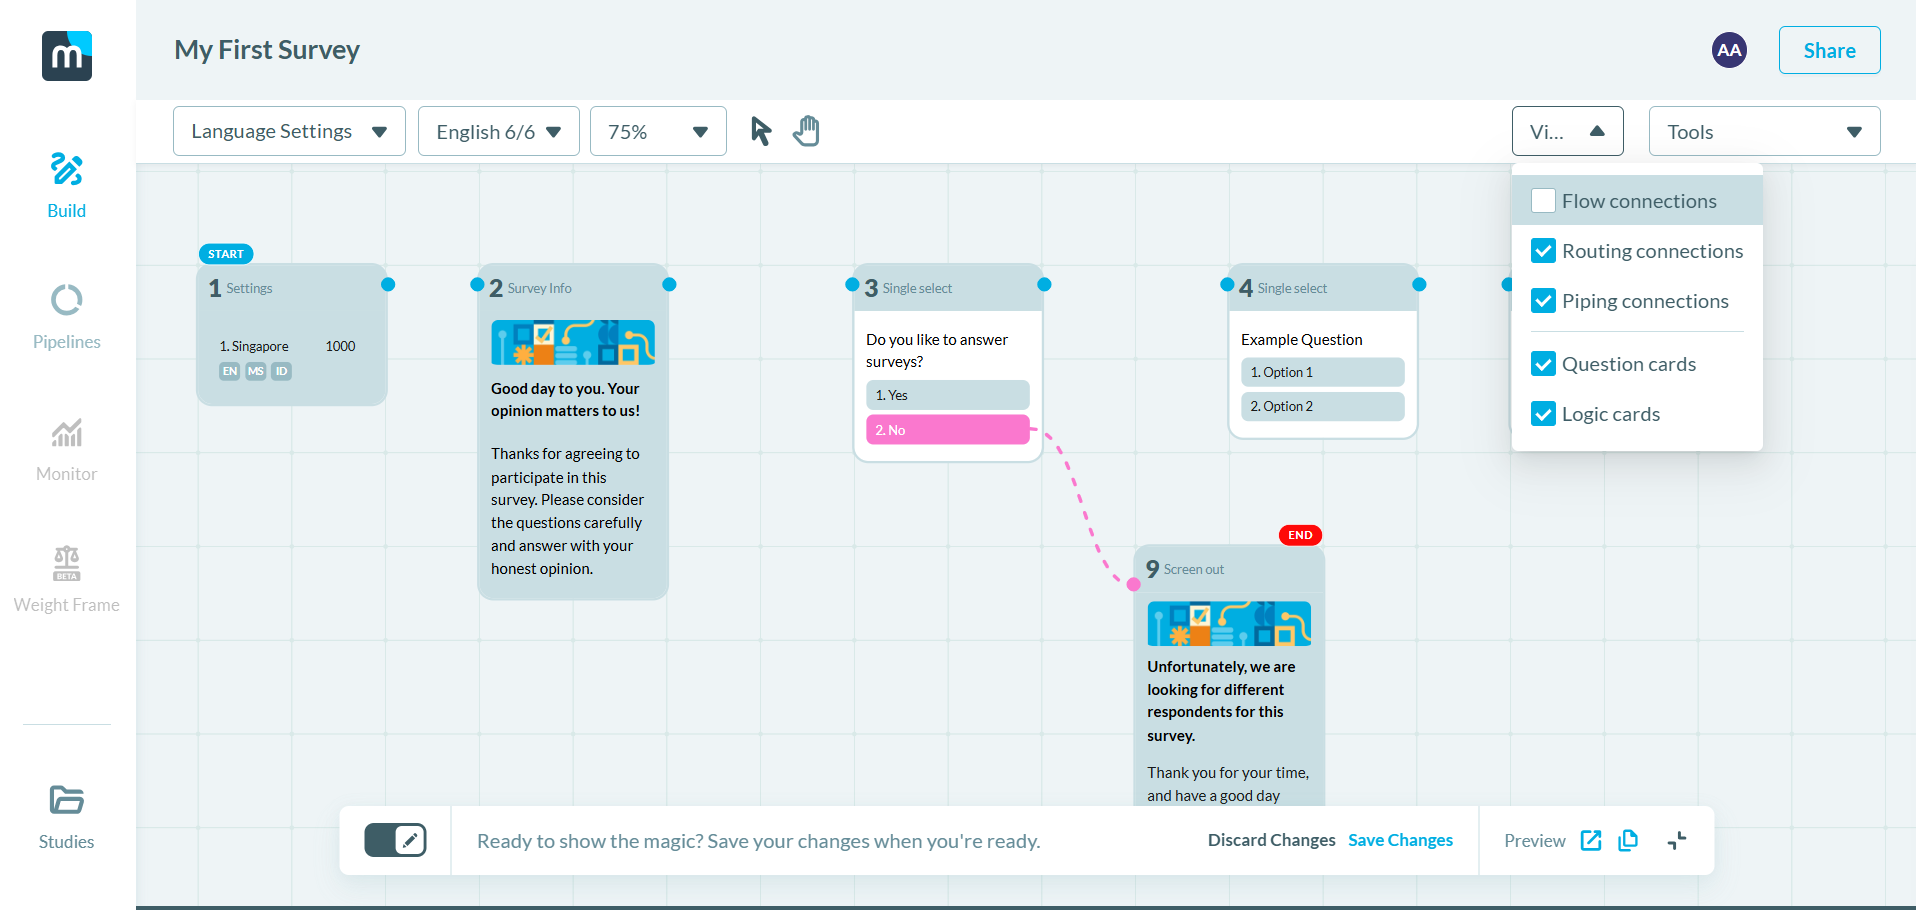
Flow connectors are hidden from view
11. Delete or Duplicate Dropdown Menu
You may select a card in Visual Editor and then either choose to delete or duplicate them here.
For lessons on scripting a survey on the Visual Editor, please see here.
Was this article helpful?
That’s Great!
Thank you for your feedback
Sorry! We couldn't be helpful
Thank you for your feedback
Feedback sent
We appreciate your effort and will try to fix the article